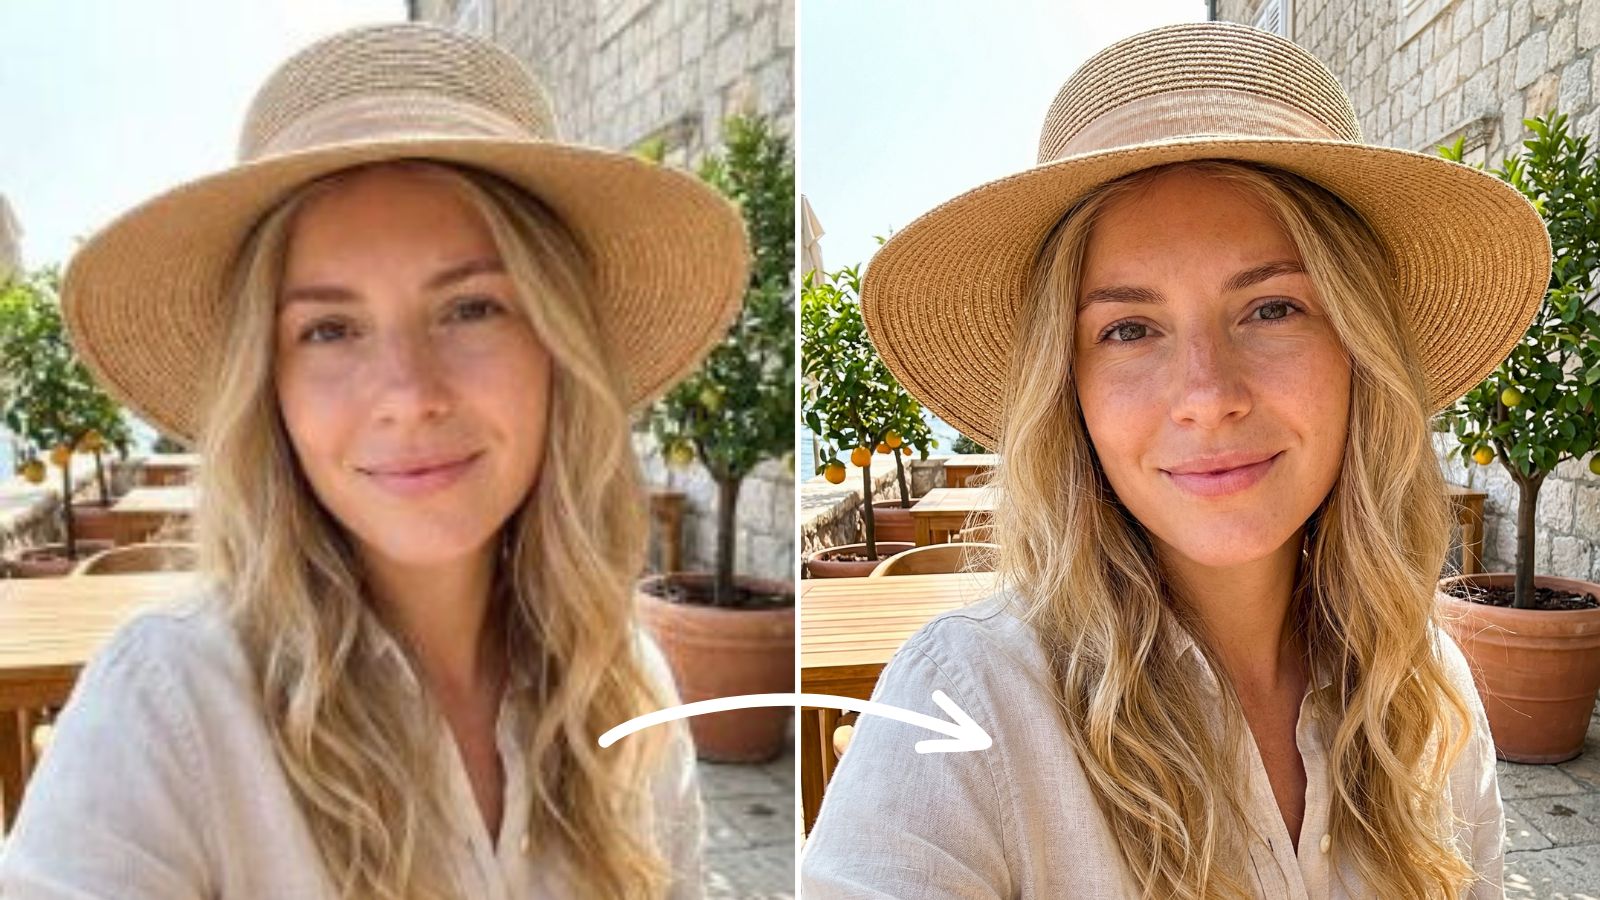
How to Create Halloween Photo Edits with Meitu
By Meitu Featured Editing Team · Updated September 28, 2026
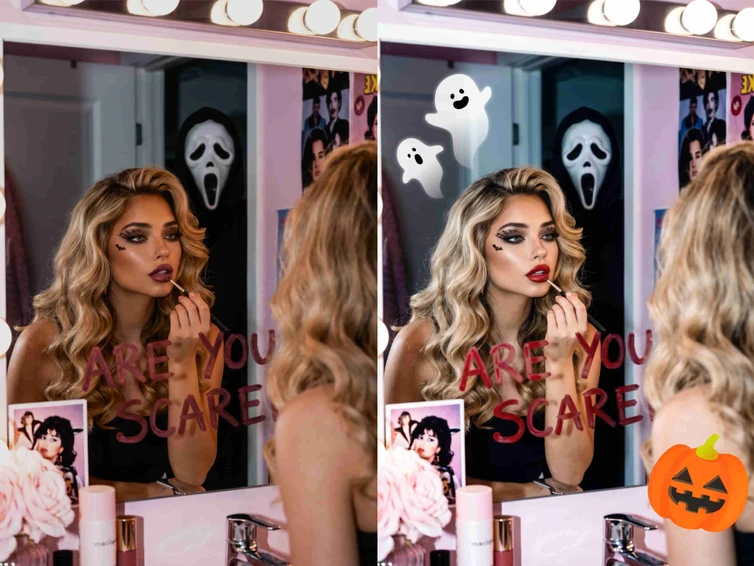
To create a Halloween photo edit with Meitu, start with a clear portrait, choose a lighting or color treatment, and add a few decorations that suit the scene. For a flash-lit party look, use Adjust > Light > Flash, refine the intensity, then add stickers before saving. You can also bring several moments together in Collage.
This guide offers three Halloween photo ideas and a five-step walkthrough for a flash-lit portrait. The aim is to make your costume, expression, and setting work together, whether you prefer a playful pumpkin mood or a darker party photo.
Table of Contents
- Choose your Halloween photo style
- Before you start
- How to create a Halloween portrait in Meitu
- Check your Halloween edit before sharing
- FAQs
Choose Your Halloween Photo Style
Start with the mood you want the photo to have. One clear direction makes it easier to choose lighting, colors, and decorations that belong together.
- A flash-lit costume portrait
Use a party portrait with a darker background and visible detail in the face. A flash-style edit can make costume makeup and clothing easier to see while leaving some of the room’s atmosphere intact. Keep decorative accents near the corners so the expression remains the focus.
- A warm pumpkin-night portrait
Start with a photo that includes a pumpkin, orange decorations, or warm room lighting. Preview a warm-toned filter and keep its strength low enough to preserve the colors of your skin and costume. Repeat one accent color in a small sticker or border detail for a playful, coordinated finish.
- A spooky photo-booth collage
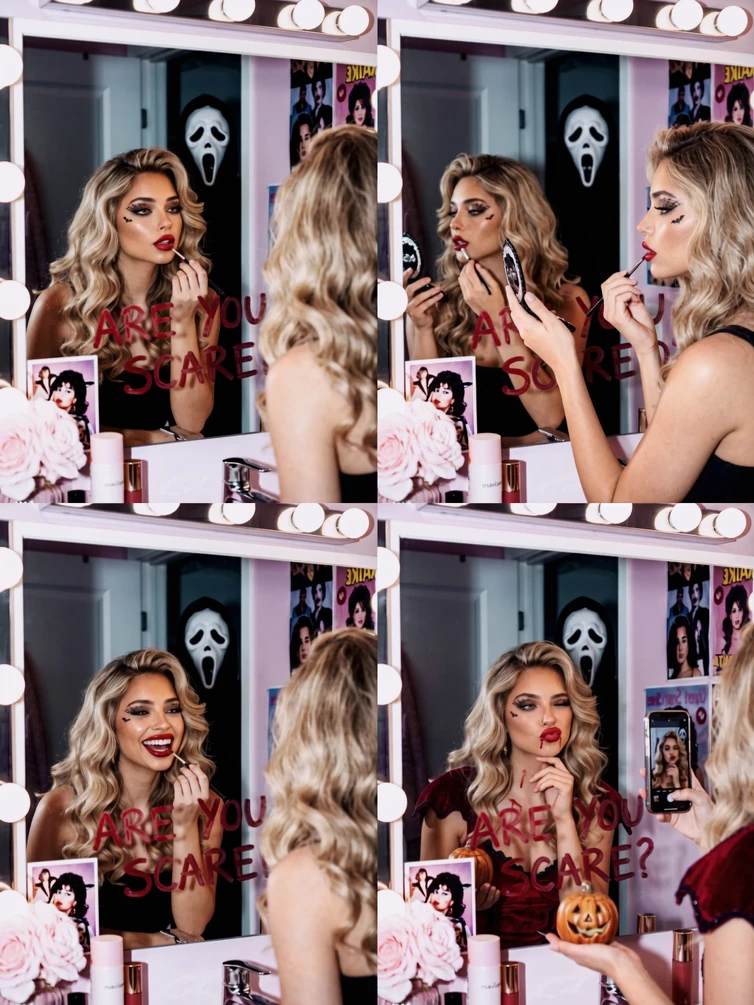
Choose four photos with different expressions, poses, or costume details. In Collage, select a layout with four spaces and adjust each image so faces and accessories fit. Try matching color treatments or a monochrome look, then add a short caption such as “After Dark” if it suits the layout. This approach arranges your selected photos into one composition.
IMAGE 02
Before You Start
Choose an original photo with a clear face and visible costume detail. Leave some space around the head and shoulders for decorations, and keep a copy of the unedited image. If you plan to make a collage, prepare photos with reasonably similar lighting.
Meitu is free to download and offers in-app purchases. Check the access requirements shown for each tool or asset. Available styles and tool placement may differ by app version; the walkthrough below uses Flash for its lighting effect.
How to Create a Halloween Portrait with Meitu
Step 1: Open your photo
Open a portrait from your photo library in Meitu. Choose a framing that keeps the costume’s defining details visible, such as a hat, collar, or face paint. If you crop the image, leave a little room for decorative elements rather than cutting tightly around the face.
Step 2: Add a flash-style lighting effect
In the main editor, tap Adjust, select Light, then choose Flash. Wait until processing finishes so you can preview the effect. This is a useful direction for a dim party portrait when you want the person to stand out against the room.
If your photo already has the lighting you want, you can keep it and move on to the decorative details. The flash look is one creative option, not a requirement for a Halloween edit.
Before After Flash
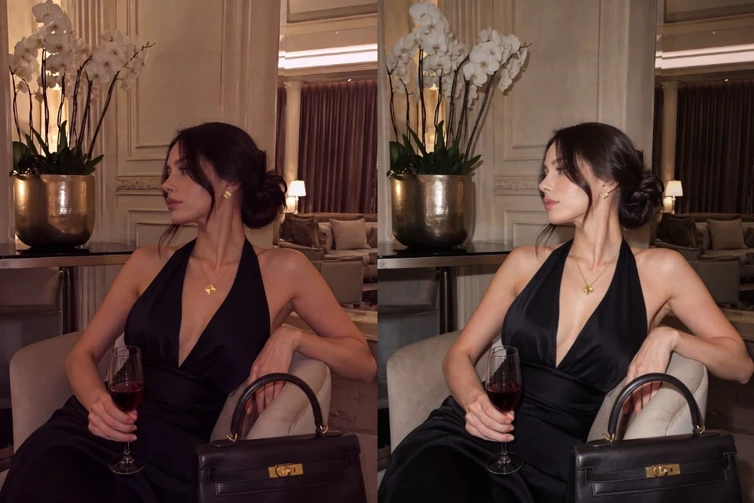
Lighting reference: Meitu’s Flash effect on an indoor portrait. Use your own costume or party photo for the Halloween edit.
Alt: Indoor portrait before and after Meitu’s Flash effect, illustrating a brighter subject against the existing room background.
For the full lighting walkthrough, see [How to Brighten Photos with a Flash Effect in Meitu][flash].
Step 3: Refine the intensity
Move the intensity slider while watching the forehead, cheeks, and costume. Lower the effect if bright areas lose visible texture or the makeup colors change more than you want. Check the whole scene, then tap the checkmark to apply the lighting. The right setting depends on your photo.
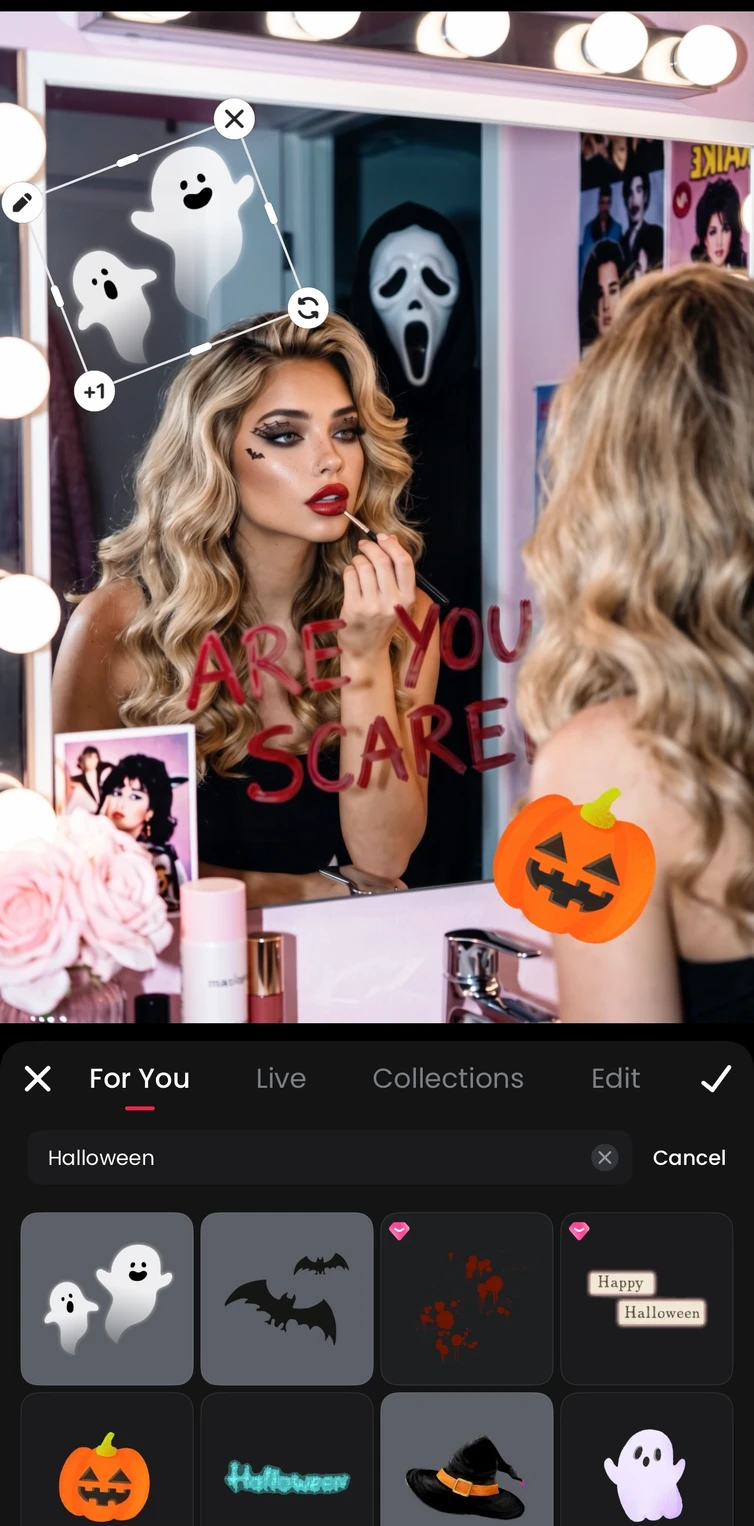
Step 4: Add a few Halloween details
Open the sticker tool and browse the designs available in your app. Choose one or two accents that fit your Halloween mood. A small pumpkin near a lower corner or bats along an empty edge can work if those designs are available. Resize and position the stickers so they leave the face and costume details clear.
Keep the decoration simple: use one illustration style and a limited color palette. The costume or props can carry the theme even when you use only a small accent.
IMAGE 03
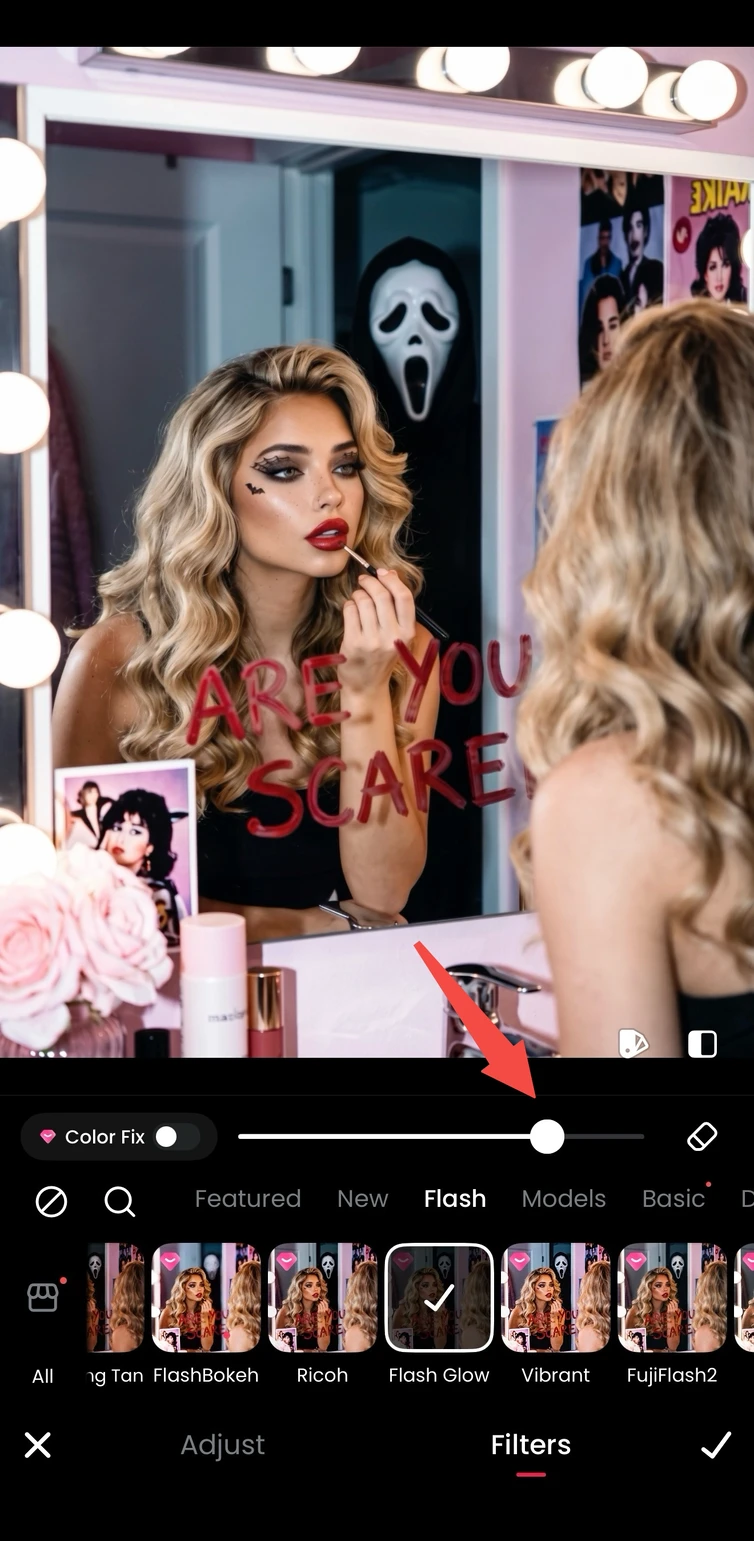
IMAGE 04
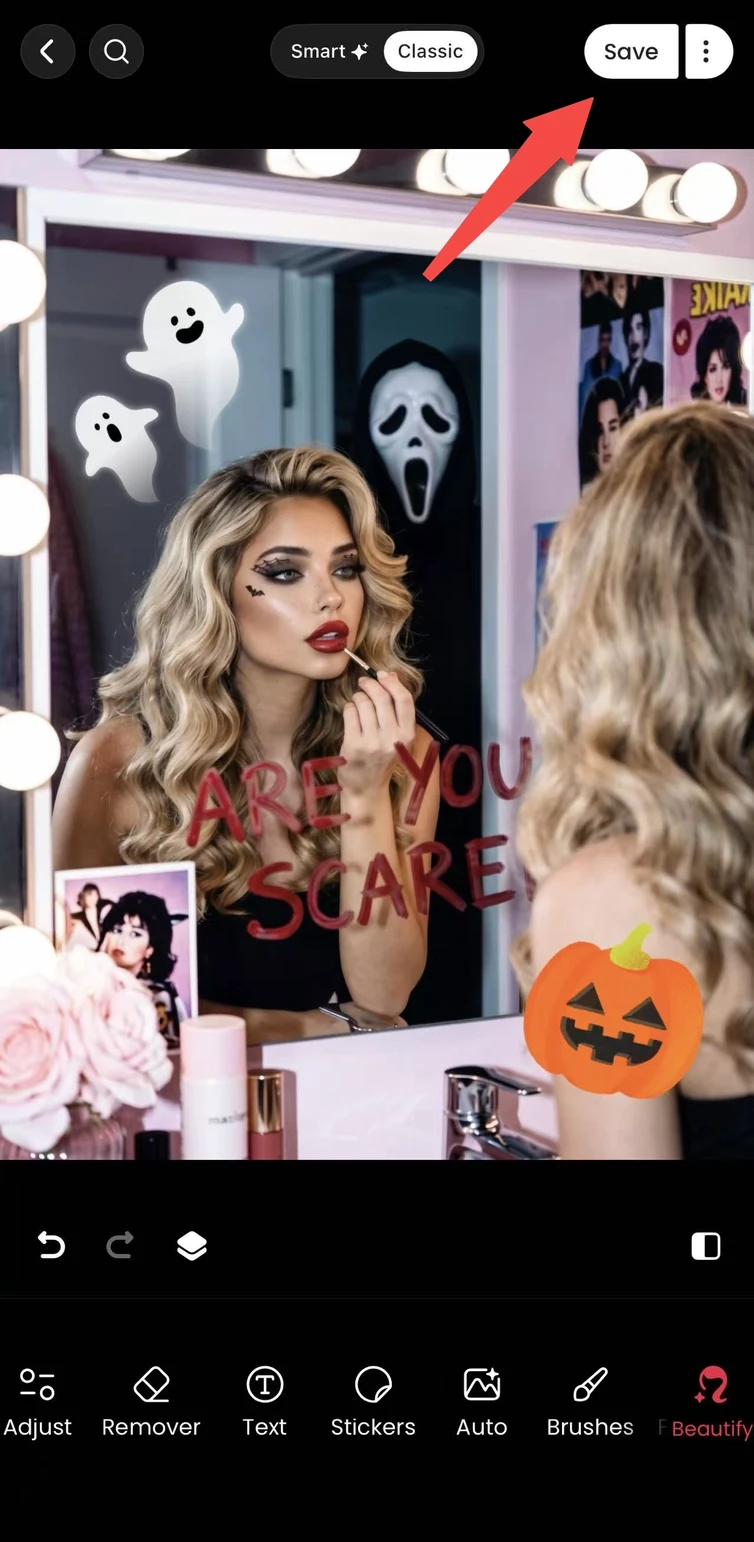
Step 5: Review and save
View the complete image at a normal size. Check that the face is clear, the costume is easy to recognize, and no decoration is cut off at the edges. Confirm any pending changes, return to the main editor, and tap Save. Open the saved image in your photo library before sharing.
IMAGE 05
[Download Meitu for iPhone][ios] | [Get Meitu for Android][android]
Check Your Halloween Edit Before Sharing
- Keep faces, makeup lines, and costume details visible.
- Leave room around the head, hats, and decorative accents.
- Preview the final crop in the app where you plan to share it.
FAQs
Can I make a Halloween edit from a photo I already have?
Yes. Start with a clear portrait and build the mood through lighting, color, and a few decorative details. A full costume is optional; dark clothing, a pumpkin, or an existing party setting can give the edit a useful starting point.
Do I need a special Halloween filter or template?
No. You can combine the editing tools and assets available in your app. This guide uses Flash, stickers, and an optional collage. The three ideas are creative directions, rather than names of specific filters or seasonal packs.
What Flash intensity should I use?
Choose the setting that suits the original lighting. Check highlights and costume textures as you move the slider. There is no single value that works for every photo, and an already bright portrait may not need Flash at all.
How do I keep costume makeup from looking washed out?
Compare the edit with the original, especially around face paint, lipstick, and pale fabrics. Reduce the lighting or filter strength if colors look faded or details disappear. Keep the treatment that lets you see the makeup you want to show.
How can I make a Halloween photo-booth-style image?
Select four photos in Collage and choose a layout that holds them. Adjust the framing inside each space, use a consistent color treatment, and check every face before saving. See our [photo collage guide][collage] for more detail.
Are these Halloween edits free to make?
Meitu is free to download and offers in-app purchases. Individual tools, stickers, or templates may have access requirements. Review any price or membership information shown in the app before applying an asset or saving your edit.
Make a Halloween Photo That Feels Like You
Choose a mood, start with a photo you like, and build the edit around its strongest detail. Try a flash-lit costume portrait, a warm pumpkin scene, or a four-photo collage. Keep the decorations focused, review the result, and save the version you want to share.